Template Fields
Template Fields
Easily tag or categorize your checklists with Template Fields. Say you use Checklist Pro to manage your hotel and you have a Room Cleaning Checklist. Each time you run the checklist, you would like to be able to assign it to a specific room. This is where Template Fields come in handy: you can add a "Room" field to the template and in it list all your hotel rooms. Then, when triggering the template, you can select which room number this checklist should apply to.
Other examples:
- Property Maintenance checklist. Need to maintain multiple properties? List all your properties in the template field as a "Property"
- Mechanic checklist. If you have a list of cars you regularly inspect, you can list them as a field
- Equipment Inspection. If you use the same checklist to inspect multiple equipment items, you could list them all as a field
Let's see how easy it is to add a field to your template.
Create a field
Open the template you want to add the field to and click on the Template name row. The Template Settings will open in the left pane. Look for the Fields section:
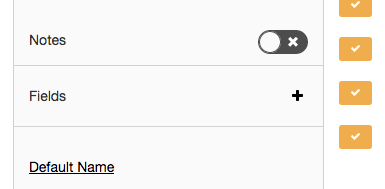
Initially it will be empty as you have no fields defined. Click on the + button to create your first field. The Template Field modal will open:
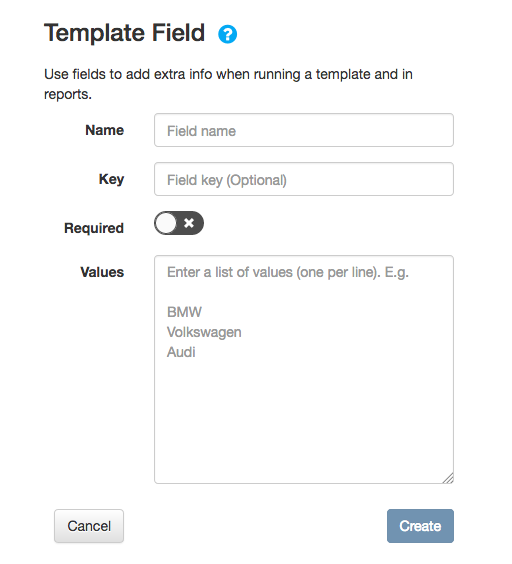
Start by giving your field a name. Examples can be Room, Vehicle.
The Key field will automatically be populated based on the name selected.
Note: the key can be used later on when exporting checklists to other apps. You can leave it as is if you don't need it
Next, set the Required field on or off depending on your needs. If you mark the field as required, users triggering this template will have to select a value for the field.
Last, enter the list of values the field can have: one value per line.
Tip: You can simply copy from Excel or another app and paste into the text area.
In our Hotel Room example, we will enter the room numbers as follows:
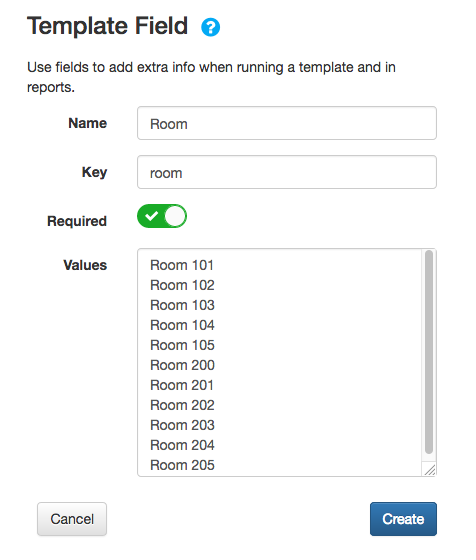
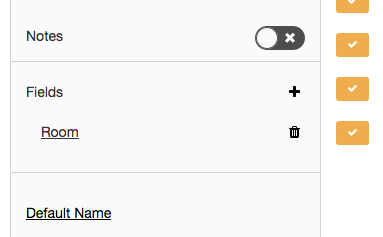
Check that all details are correct and hit Save. The window will close and you will see the Template again. Check out the new field showing on the left pane:
Tip: Don't forget to save the template as your changes are not saved until you click Save.
Editing a Field
You can now click on the field name from the Template Settings pane. This will open the Field modal with your field details:
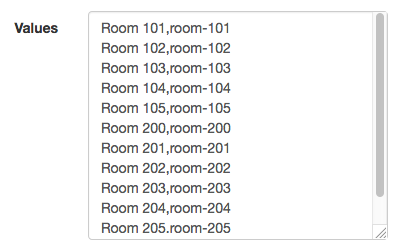
Note: the field values now have an extra key on each line. Again, this is useful if later on you wish to export your checklists to other applications or integrated them with other systems. You can edit the keys yourself but make sure you do not use the same key twice.
Deleting a Field
Click on the Trash button to the right of a Field (from the Template Settings pane) to delete it. Confirm and Save your template.
Choosing a Field on Trigger
Now that you have your field defined in the template, click on the Trigger button (on the Template Settings or from the Templates or Dashboard). The Trigger modal will open and your field will be shown as a drop down:
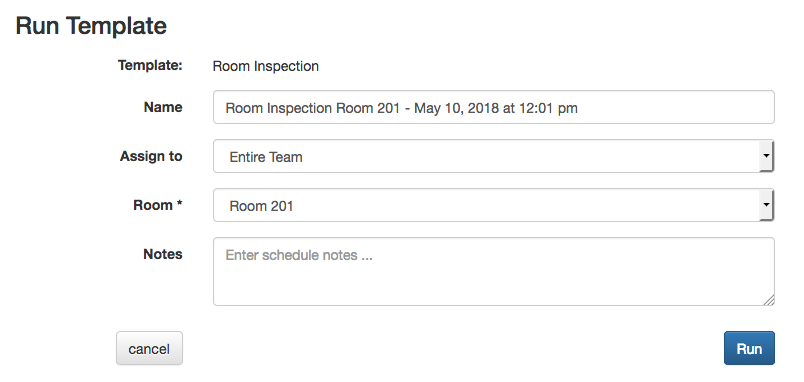
Choose a value for the field. Notice how the name of the checklist changes as well. This allows you to easily see which field this checklist refers to without having to open the checklist. What if you want to change how the checklists are named? Read below how.
Read next: Changing the Default name of a Checklist.
