How to manage your contacts

On the "My Contacts" screen you will see (top to bottom):
- Back button to return to the Settings page
- Name or email text box (see below)
- First will be shown your Checklist contacts. They will have a blue checklist icon on their right. You can click the X button to remove them from your contacts. If a contact is pending approval it will be noted. If you need to approve a contact, please click on it to approve. Otherwise, click on the X to remove them.
- Next will be shown your device contacts which have an email address. Since checklist invitations are sent via email, we do not show other contacts.
Inviting a new contact
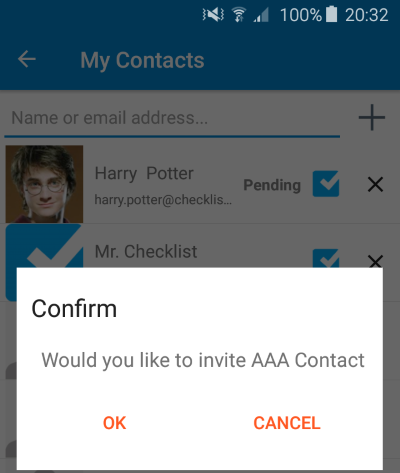
To invite a new contact you can:- Device contacts. click on their name and an invitation will be sent.
- Other contacts. You can start typing the contact email address. Once the email address you entered is valid, click the Orange + sign and an invitation will be sent.
Reminding pending contacts
If a pending contact has not reacted on your invitation, you can click on them to send them a reminder. Please use this with caution to avoid spam. In any case, we will not send more than one reminder.
If for some reason they take too long, simply contact them directly and ask them accept the request. If they cannot find the invitation email, ask them to register on Checklist.com using the same email address you used to invite them.