How to use the Checklist Widget
- On your device, scroll to the page you wish to add the widget to
- From your device Home page click on "+ Add apps and widgets" (possibly a long press on the screen)
- Select Widgets
- Scroll until you see the Checklist widget
- Select the widget
- Place the widget on the page.
- You may re-size the widget
- The Widget checklist selector page will open:
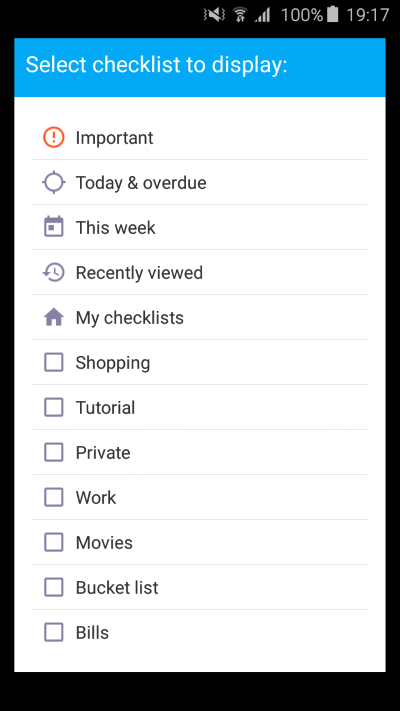
- On the checklist selector screen you can choose which Checklist you wish to display on the widget. You can choose from My Checklists which will show all your checklists, a smart list or a checklist.
- Once selected, the screen will close and you will see the device screen with the widget on it:
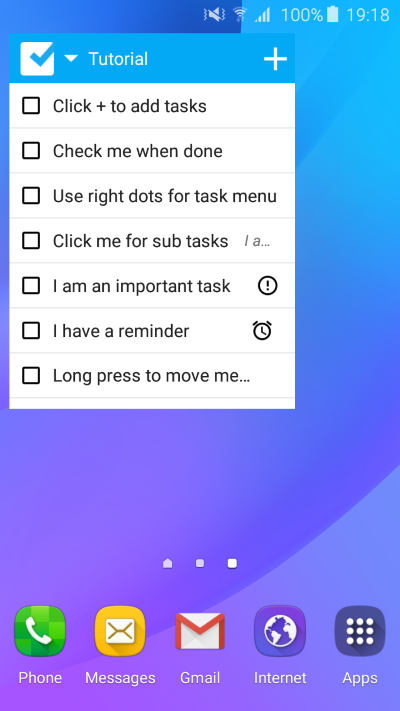
As the image above shows, the widget is consists of:
- The Checklist icon. Clicking on it will open the app. The last opened checklist/ task will be
- A "Down arrow" which will open the Checklist selector screen so that you can select a different checklist to show on the widget
- The name of the list currently displayed. Clicking on it will open this checklist in the checklist app.
- A + button. Clicking on it will open the Add Task screen in the app.
- The tasks. All open tasks within the selected checklist are shown.
Each task on the widget has:
- Checkbox. Clicking on it will mark the task as completed and remove it from the widget (since we only show open tasks).
- Name. Click on the task name to open it in the Checklist app
- Notes (optional). Shows the task notes.
- Important icon (optional).
- Reminder icon (optional).
Tip: You can place on your device as many widgets as you like and each one can be set to show a different checklist.
Note: we have strongly resisted the urge to develop the full functionality of the app in the Widget. Please remember that the Widget is simply a view to the app and most functionality should be handled from the app itself. This is also in accordance with the Android design guidelines.