Editing a Template
Editing a Template
After creating a new template, the Template Editor will open with your new (currently empty) template. You can also reach this page by clicking on the Pencil icon to the right of the template name on the templates page.
This is what the page looks like with a sample Hotel Room Cleaning template:
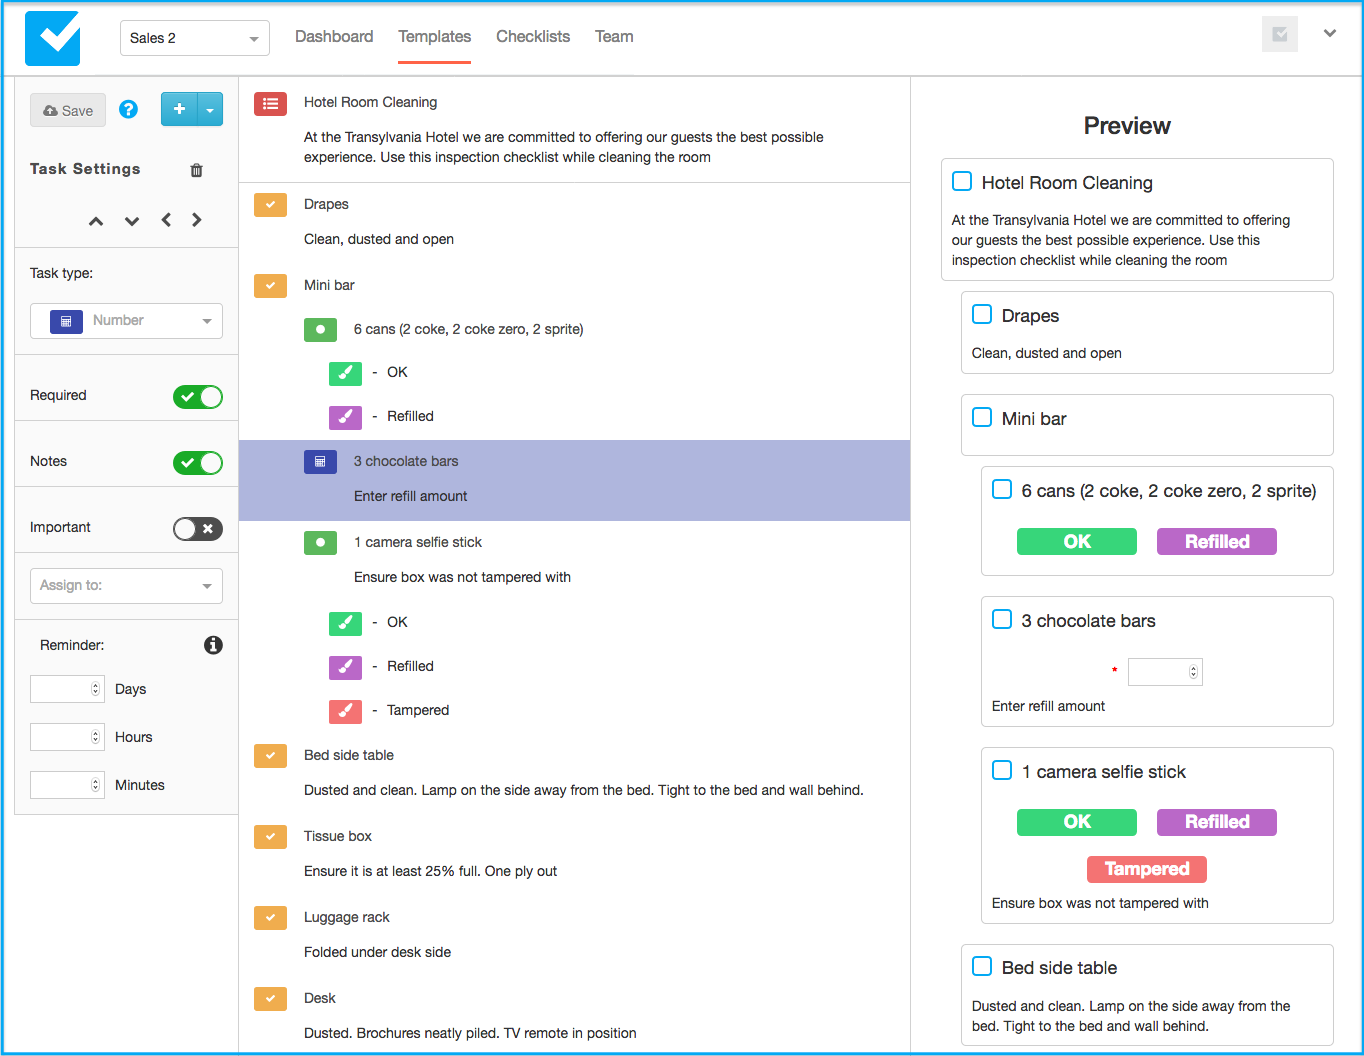
The Anatomy of the Template Editor
The Template Editor is has three panes (from left to right):
- Properties
- Tasks
- Preview
The Tasks Pane
In the middle column are the checklist template TASKS with one task per row.
The top row is dedicated to the Template itself and is marked with a red checklist icon. The rest of the rows are the template tasks.
Clicking anywhere on a row will highlight it and load the task/ template properties in the left Properties pane.
See Working with Tasks for more info on how to work with the tasks.
The Properties Pane
The Properties pane (left column) allows you to view and edit the properties of the template or of selected task.
At the top of the pane you will find the following static buttons (they do not change)
- Multi-task Add. Opens the Multi Add dialog which lets you add multiple tasks in one go.
- Help. This will open the Editor documentation (this page) in a new browser tab.
- Save. If you make any changes to the template, the button will turn Orange until you click on it and the changes have been committed to the cloud. Make sure you save your work frequently and be aware that once you make changes, the rest of your team will see them.
The Preview Pane
The Preview pane (right column) shows a preview of your checklist template. This is what users will actually see when using the checklist on a desktop client. It provides you with a great way to visualize the template you are working on through the eyes of a user. The preview gets updated as you make changes to the template (even before you save).
Note: you cannot work with the preview. The buttons and different widgets are simply for previewing the template and any changes you make will be ignored.
Managing the Template
The rest of this document will focus on managing the template itself as well as running and scheduling templates. Skip to working with tasks.
Viewing the Template Properties
To view and edit the template properties, click on the Red Checklist icon at the top of the middle column (Tasks Pane). The row will highlight in red and the template properties will load on the left pane. Any of the following actions will require you to first focus on the template.
How to change the name of a template
Click on the name of the template in the middle pane to change its name.
How to add or edit template notes
To enable the template notes, click on the Notes toggle on the Properties pane. This will add a notes row in the middle pane:
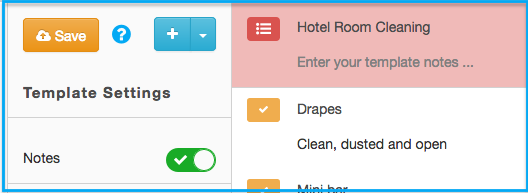
Simply click on the notes and start editing them.
Tip: If you cannot see Template Settings on the left column it is probably because you are editing a task. Click on the Red checklist icon to reveal the template settings.
Running and Scheduling
The Template Settings provides you with quick access to Triggering or Scheduling a checklist.
Managing Current Schedules
If you already have any existing template schedules, they will be shown under the Schedule button. Click on "Current Schedules" to reveal the schedules popup:

You can see all schedules for the current template. To remove any schedule, click on the Trash icon to the right of the schedule line.
Read next: Working with Tasks